Text + Graphics Sticker
How to configure a Stickers module
- To get started, create a new Design in your Admin Designs page
- Set the design dimensions you want for the stickers. This could be any size, but common sizes include 2x2 inches, 3x3 inches, or 4x4 inches.
-
Click the Design tab on the left panel and then click the
Add a Modulebutton and select Stickers Module from the list.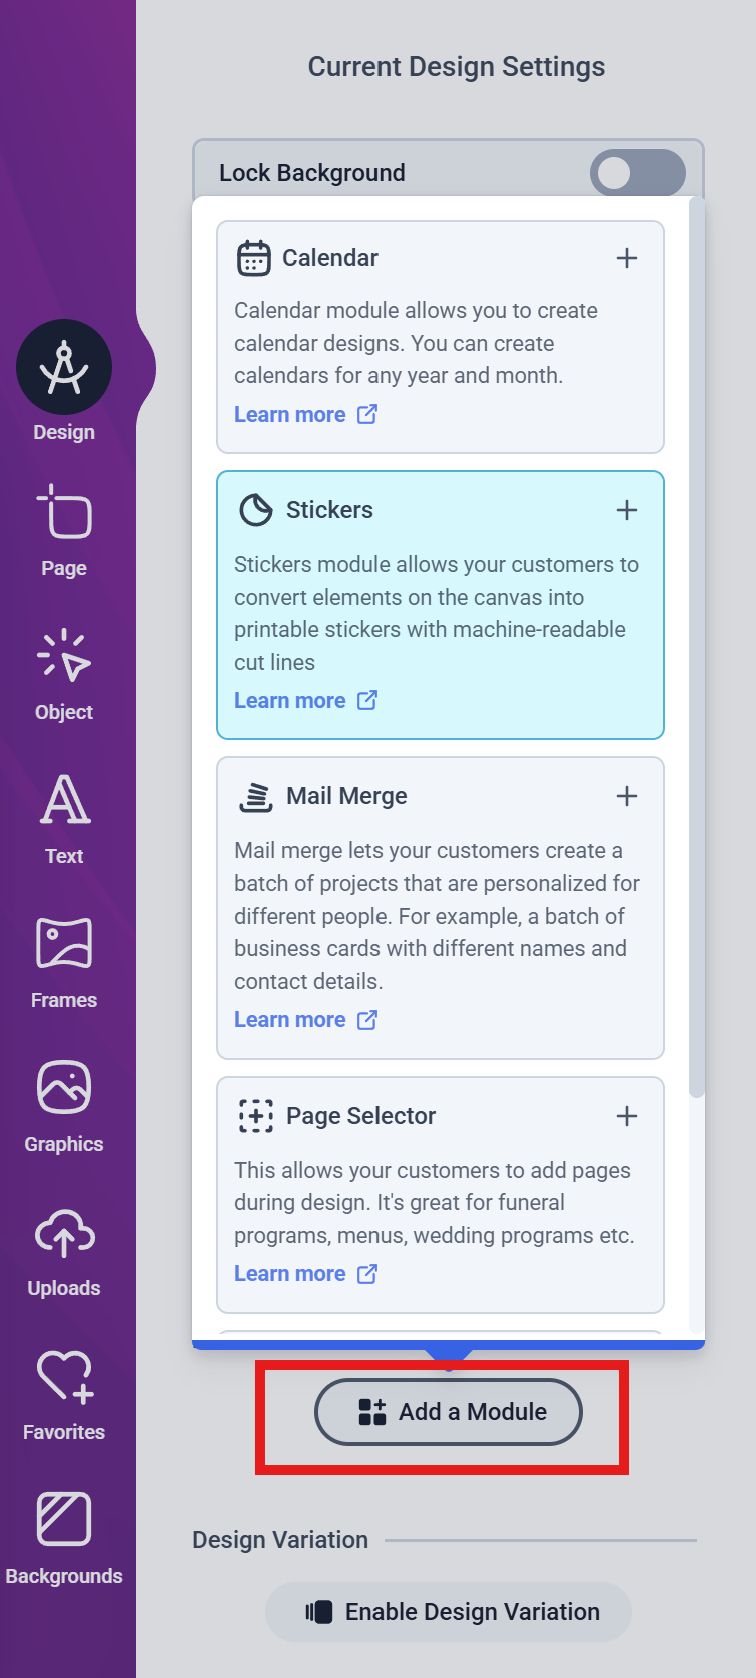
-
Next, you will see the Stickers Module configuration form as shown below:
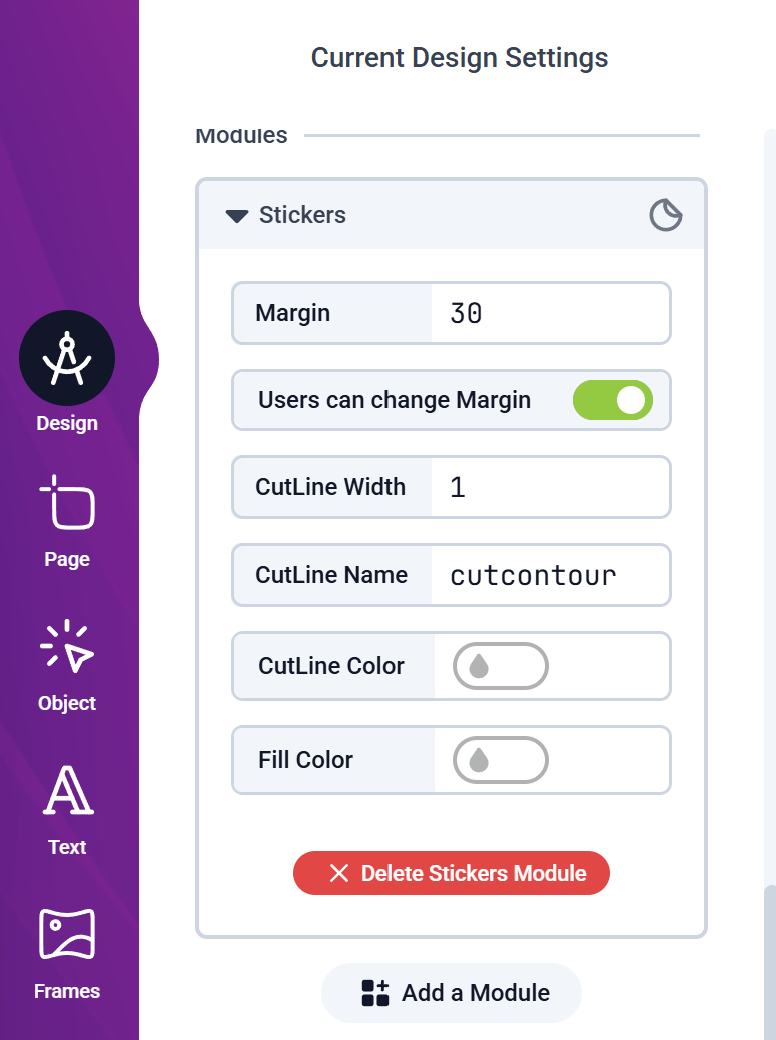
- Margin: This is the space between the edge of the sticker and the cut line in millimeters. You you can adjust this based on your design needs.
- Users can change margin: Toggling this option On allows your customers to adjust the margin themselves when customizing their stickers. It will display a slider on the canvas for easy adjustment.
- Cutline Width: This is the thickness of the cut line in pixels. A thicker line may be more visible, but it could also affect the precision of the cut.
-
Cutline Name: This defaults to
"Cutcontour", which is a standard name used by many cutting machines. This name is included in the PDF output, so that your machine can read it and identify the cutting path to follow. You can change this if your cutting machine requires a different name. - Cutline Color: This is the color of the cut line in the design. You can choose any color that works best for your design and cutting machine. This can be a standard RGB or CMYK color from your color palettes.
- Fill Color: This is the background color of the sticker. Usually White, you can choose any color that complements your design. This can be a standard RGB or CMYK color from your color palettes.
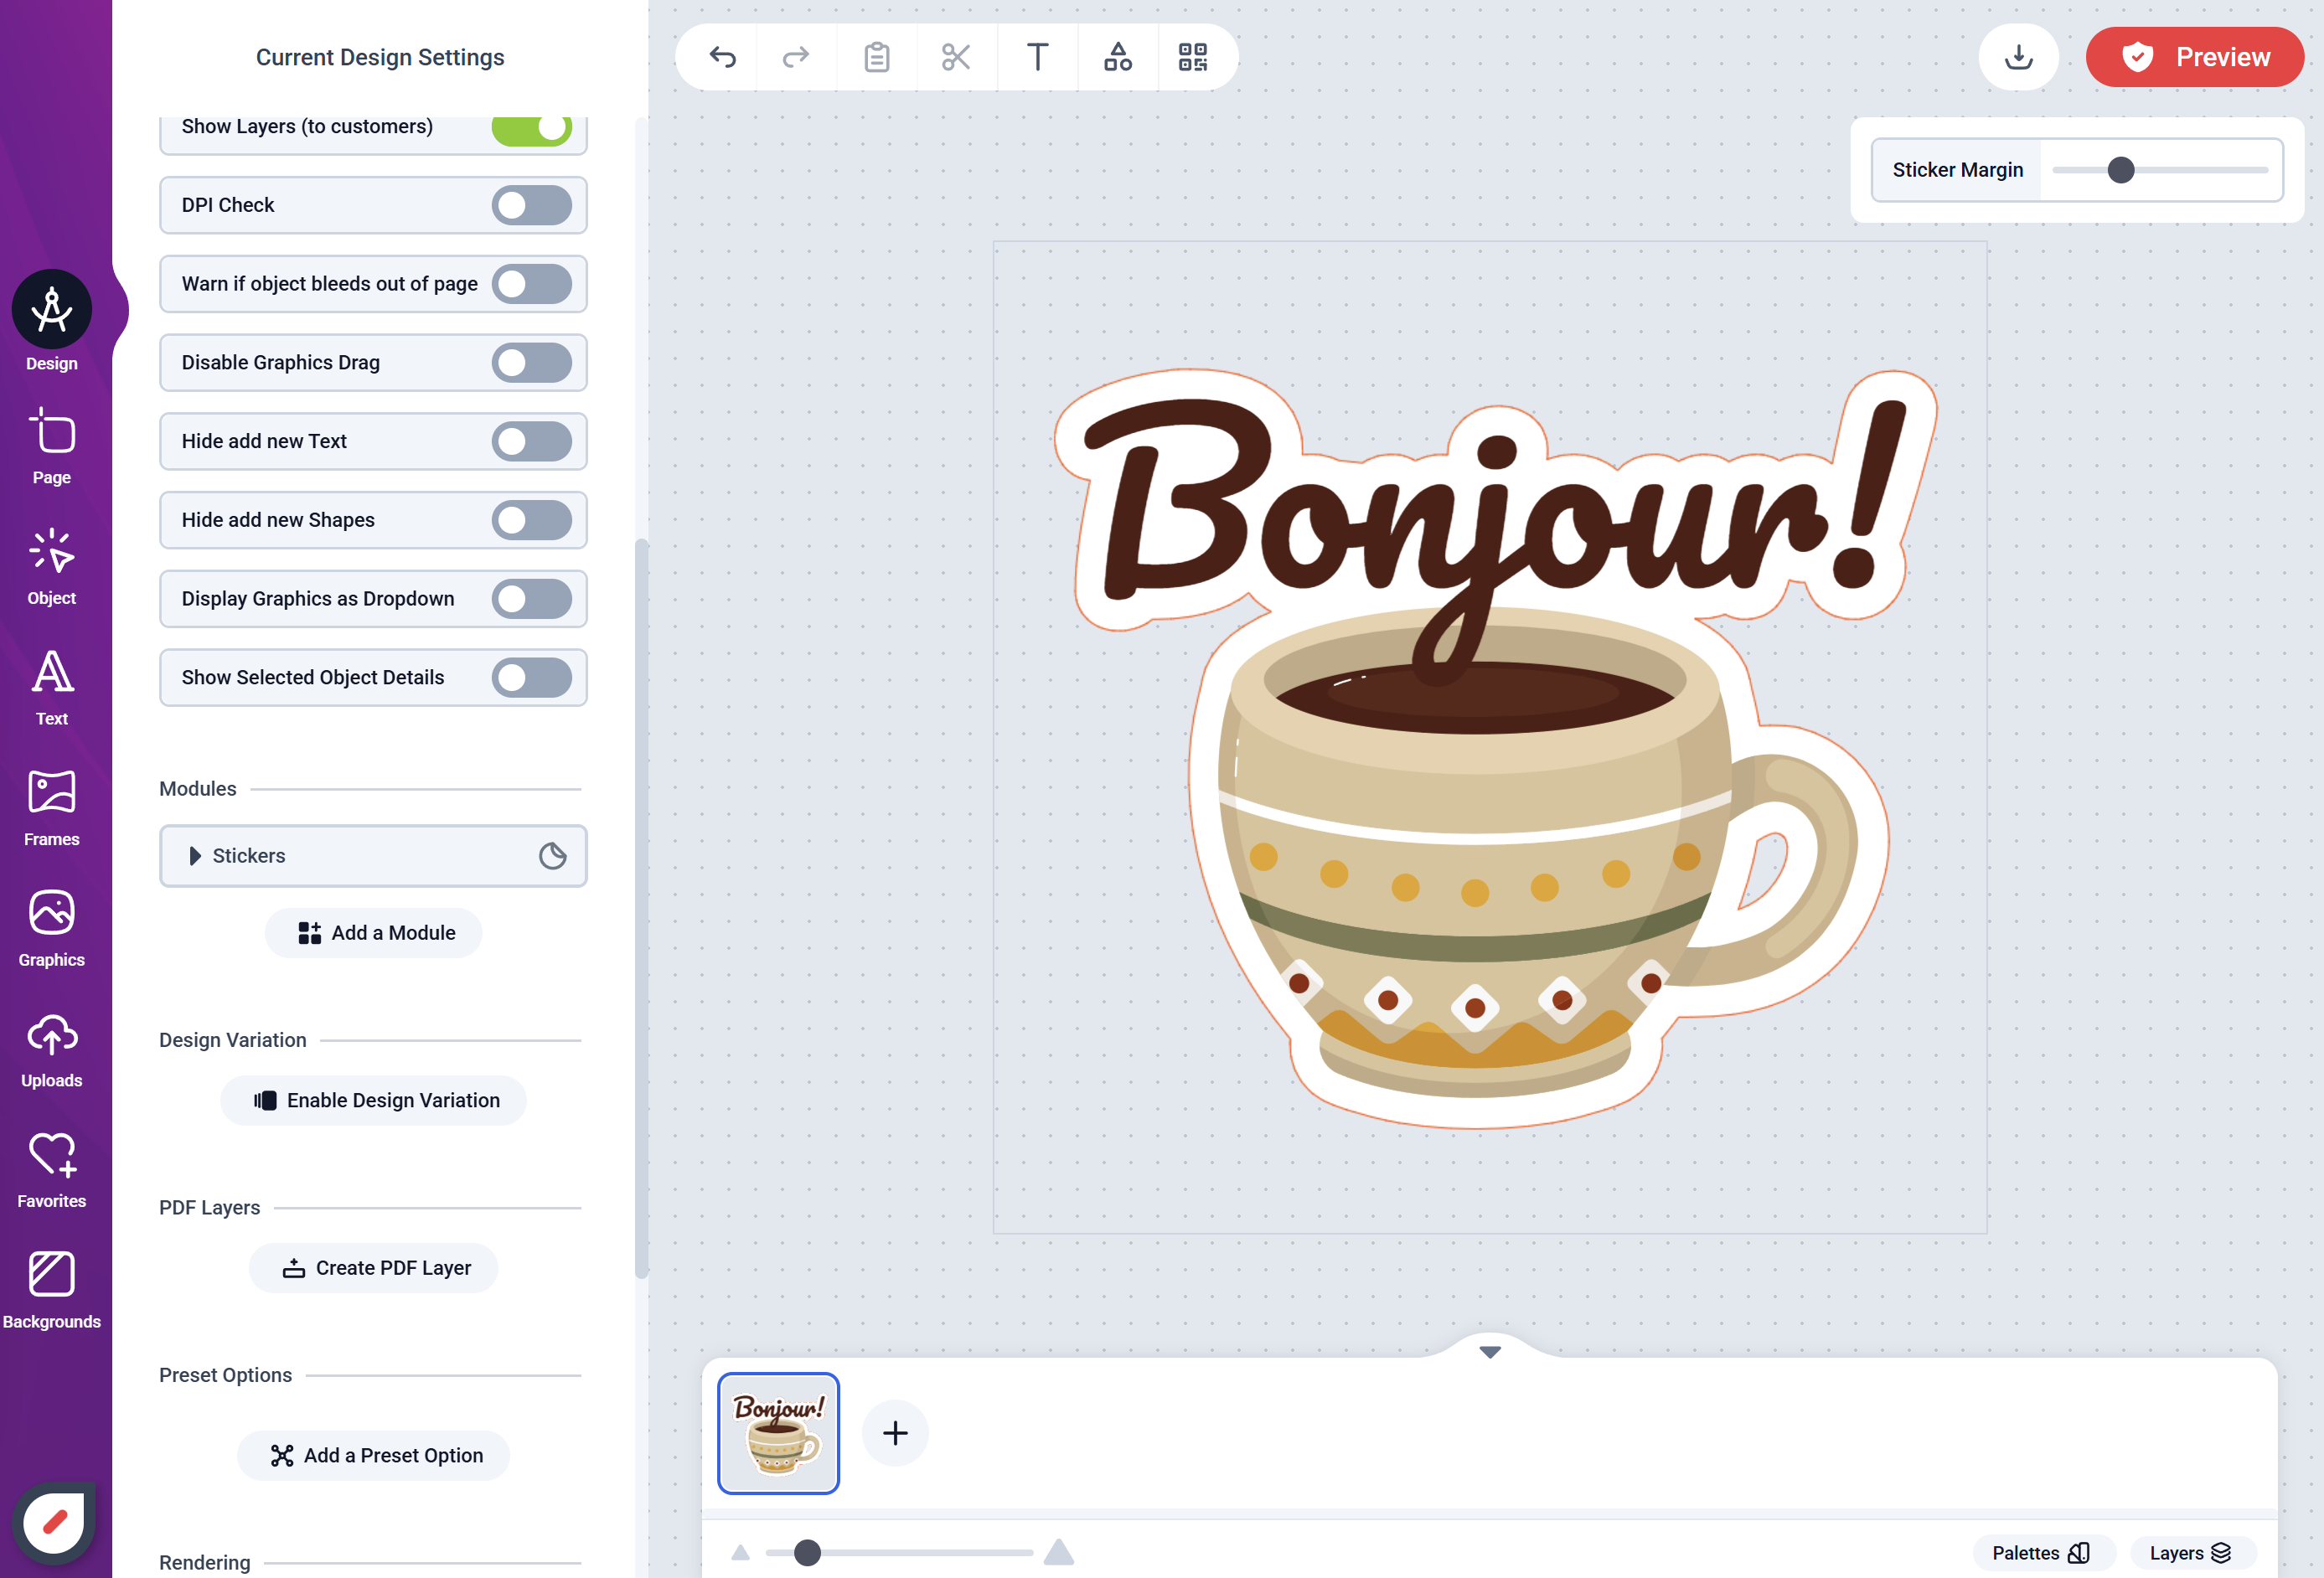
- Once configured, try adding some Texts, Shapes, SVGs, or Images to your canvas and you should see the sticker style generated like a cloud around your objects. The design background is set to transparent.
- Save your Design and assign it to a product and test as a customer on your web store.