PDF Profiles allows you to manage different PDF Rendering settings for different print processes and products. This is useful when you have products that require different color profiles, image resolutions or other PDF settings.
Creating PDF Output Profiles
To create a new PDF Output Profile, navigate to the Designs section in the admin panel and click the More Actions button on the top menu bar. From the dropdown, select PDF Output Profiles.
This opens up the PDF Output Profiles management panel on the sidebar. Here, you can see a list of existing profiles including the store defaults and create new ones.
You can click the Clone button next to any existing profile to create a new profile based on it. Alternatively, click the Create New Profile button at the top to create a new profile from scratch.
Profile Settings
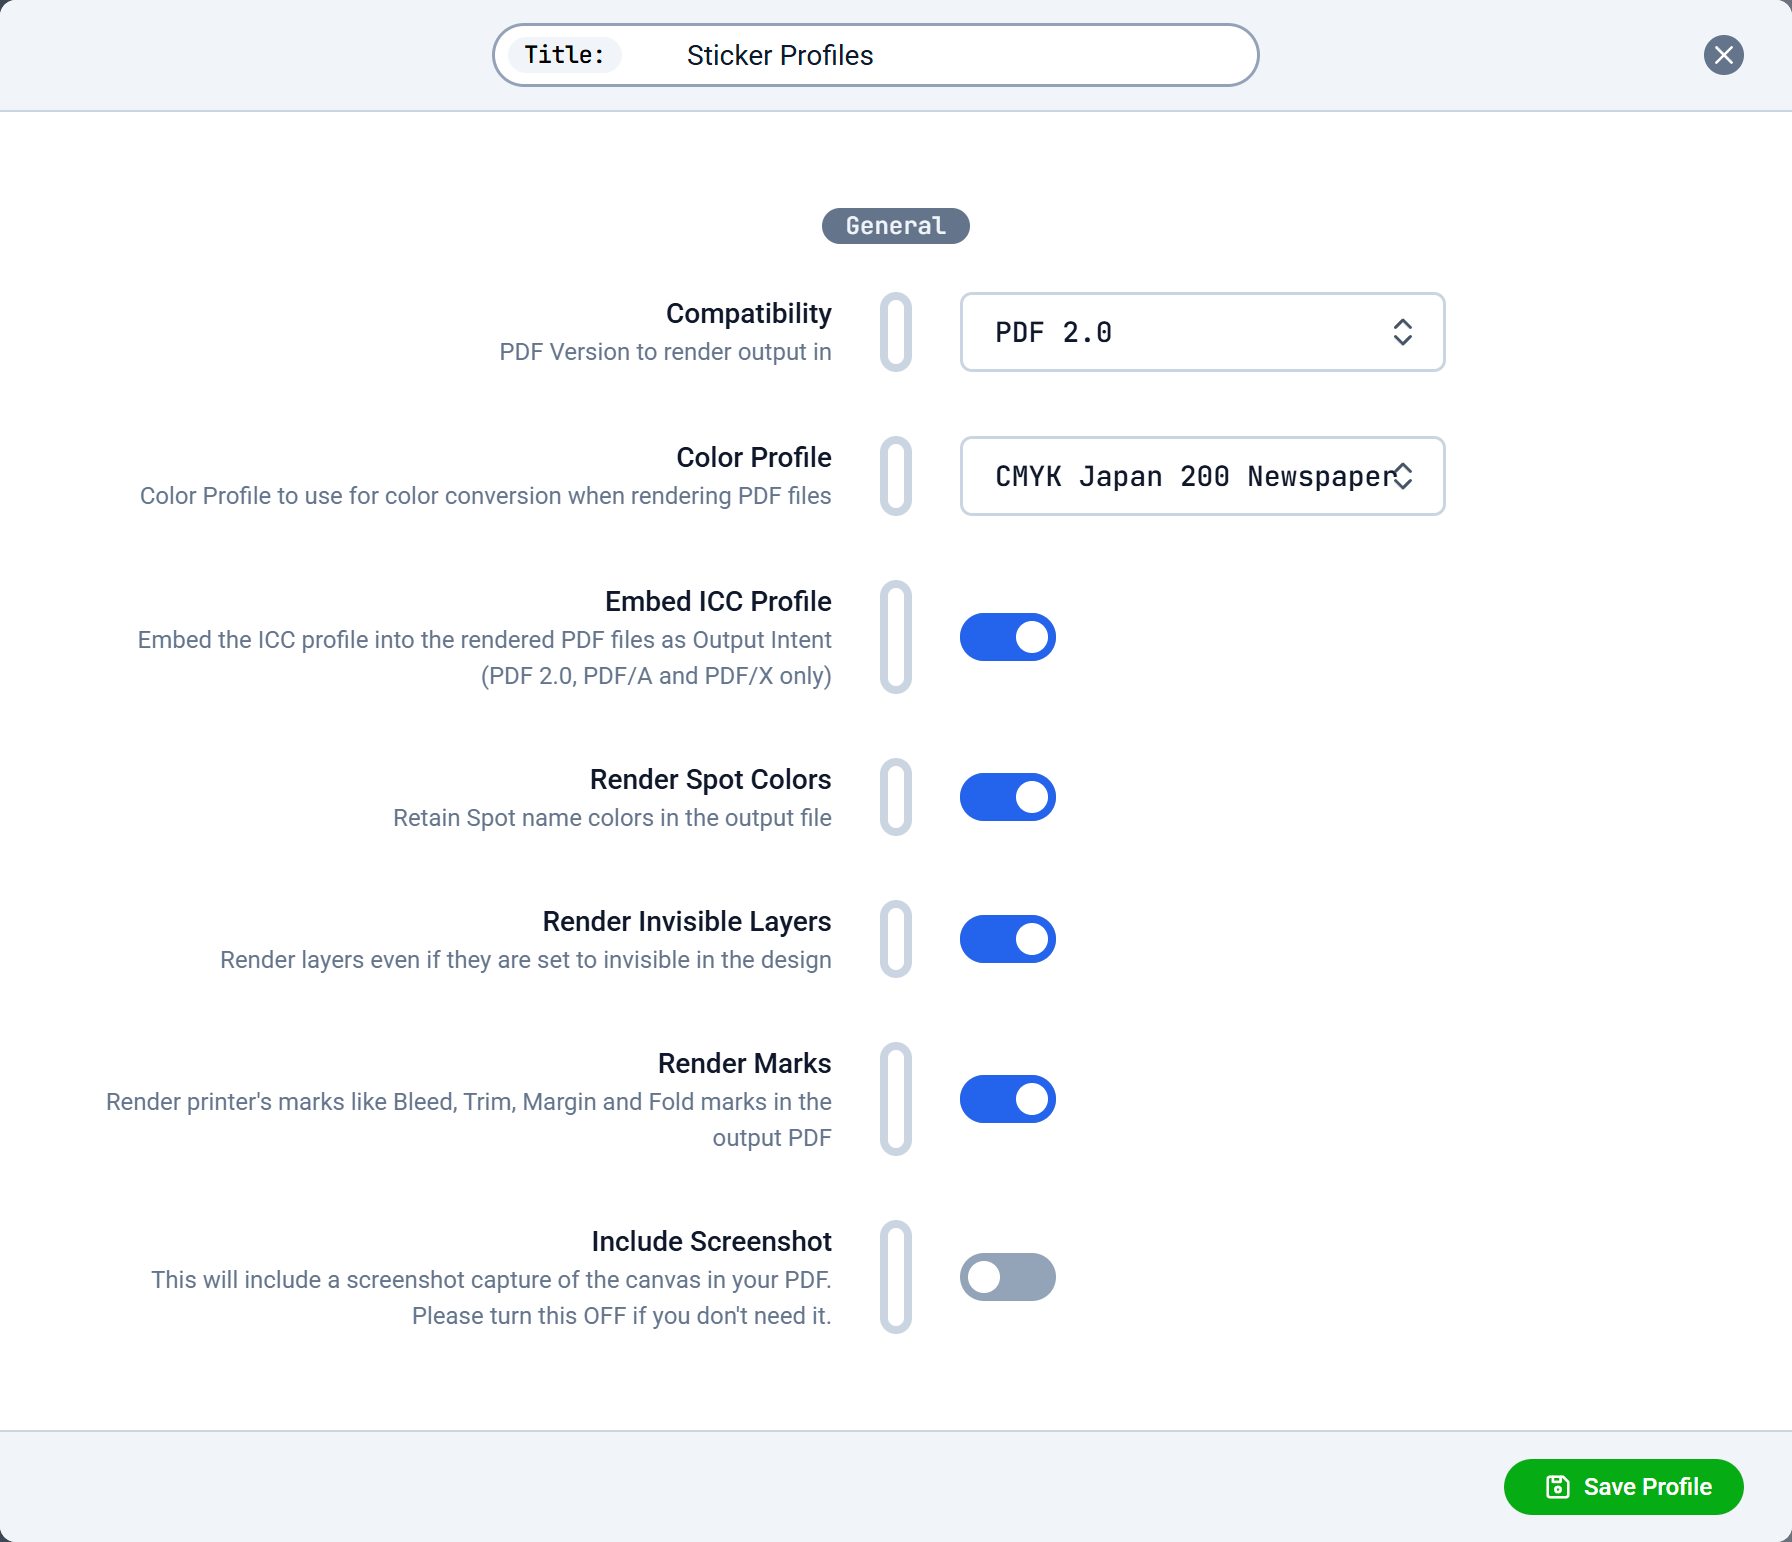
When creating or editing a PDF Output Profile, you can configure the following settings:
General
-
Compatibility: PDF Version to render output in. This impacts which PDF features are allowed and what downstream systems can open/validate. Options include PDF 1.4, 1.5.. all the way to the latest version 2.0 and standards like PDF/A-3a, PDF/UA-1 and PDF/X-5n.
Default: PDF 1.7.
-
Color Profile: Color Profile to use for color conversion when rendering PDF files. Use this to target the color space your print process expects (for example a specific CMYK profile). Includes No Conversion, device RGB/CMYK, plus common industry CMYK profiles (FOGRA/ECI/GRACoL/SWOP, etc.).
Default: No Conversion.
-
Embed ICC Profile: Embed the ICC profile into the rendered PDF files as Output Intent (PDF 2.0, PDF/A and PDF/X only). Enable this when you need compliant output that declares its intended output condition to prepress tools.
Default: On.
-
Render Spot Colors: Retain Spot name colors in the output file. Keep this enabled if your workflow relies on spot inks (and/or spot-name based separation).
Default: On.
-
Render Invisible Layers: Render layers even if they are set to invisible in the design. Turn this off if “hidden means hidden” for your production output; keep it on if you use visibility only for editor convenience but still want the content in the export.
Default: On.
-
Render Marks: Render printer’s marks like Bleed, Trim, Margin and Fold marks in the output PDF. Enable this for print-ready exports; disable it for customer-facing previews or when your RIP adds marks separately.
Default: On.
-
Include Screenshot: This will include a screenshot capture of the canvas in your PDF. Please turn this OFF if you don’t need it, as it can increase file size and may not be desired in production output.
Default: Off.
Images
-
Downsample Images: Downsample images above the specified DPI to target DPI. This can significantly reduce PDF size, but may reduce print quality if set too low for your output device.
Default: Off.
-
Downsample Resolution: Target resolution for downsampling images. Only applies when Downsample Images is enabled. Range: 72-600 DPI (
default: 300 DPI).
-
JPEG Quality: JPEG quality for rendered images in the PDF files. Only applies when Downsample Images is enabled. Range: 10-100 (
default: 91). Higher values preserve detail but increase file size.
-
Convert Image Color Space: Convert images to the specified color space selected above (Color Profile) when rendering PDF files. Only applies when Color Profile is set. Enable this when you want raster images to be normalized into the target profile for consistent color handling.
Default: Off.
-
Embed ICC Profile in Images: Embed the profile-based ICC profile into images when rendering PDF files. This can help downstream tools interpret image colors correctly, but may increase file size.
Default: Off.
-
Honor Image ICC Profile: Honor an ICC profile which may be available in the image in the final PDF rendering. Keep this enabled to respect embedded profiles (common for professional photography workflows).
Default: On.
-
Interpolate Images: Enables image interpolation to improve the appearance on screen and paper. This may smooth scaling artifacts, but can also soften edges slightly.
Default: Off.
-
Image Rendering Intent: Rendering intent to use when converting images to the target color space. Options: Auto, Absolute Colorimetric, Relative Colorimetric, Saturation, Perceptual. Use Perceptual for photos (to preserve gradients), Relative Colorimetric for more accurate in-gamut colors, and Absolute Colorimetric when simulating paper color.
Default: Auto.
Fonts
-
Embed Fonts: Embed fonts used in the design into the rendered PDF files. Recommended for reliable output on other systems/RIPs.
Default: On.
-
Subset Fonts: Subset fonts when embedding into the rendered PDF files. Only applies when Embed Fonts is enabled. Subsetting reduces file size by embedding only the glyphs used in the design.
Default: On.
-
Flatten Fonts: Convert fonts to vector shapes in the output PDF. This avoids font substitution issues, but makes text no longer searchable/selectable and can increase complexity/size.
Default: Off.
Security
-
Require Password: Require password to open the rendered PDF files. Use with care: encryption can interfere with automated prepress workflows and RIP ingestion.
Default: Off.
-
User Password: Password to open the PDF file. Passwords will not work for PDF versions lower than 1.6 or PDF/A and PDF/X standards. Only applies when Require Password is enabled.
Assigning PDF Output Profiles to Design Templates
Once you have created the desired PDF Output Profiles, you can assign them to your Design Templates. To do this, navigate to the Design Templates section in the admin panel and hover over the template you want to assign it to.
Click the Gear Icon to open the design settings.
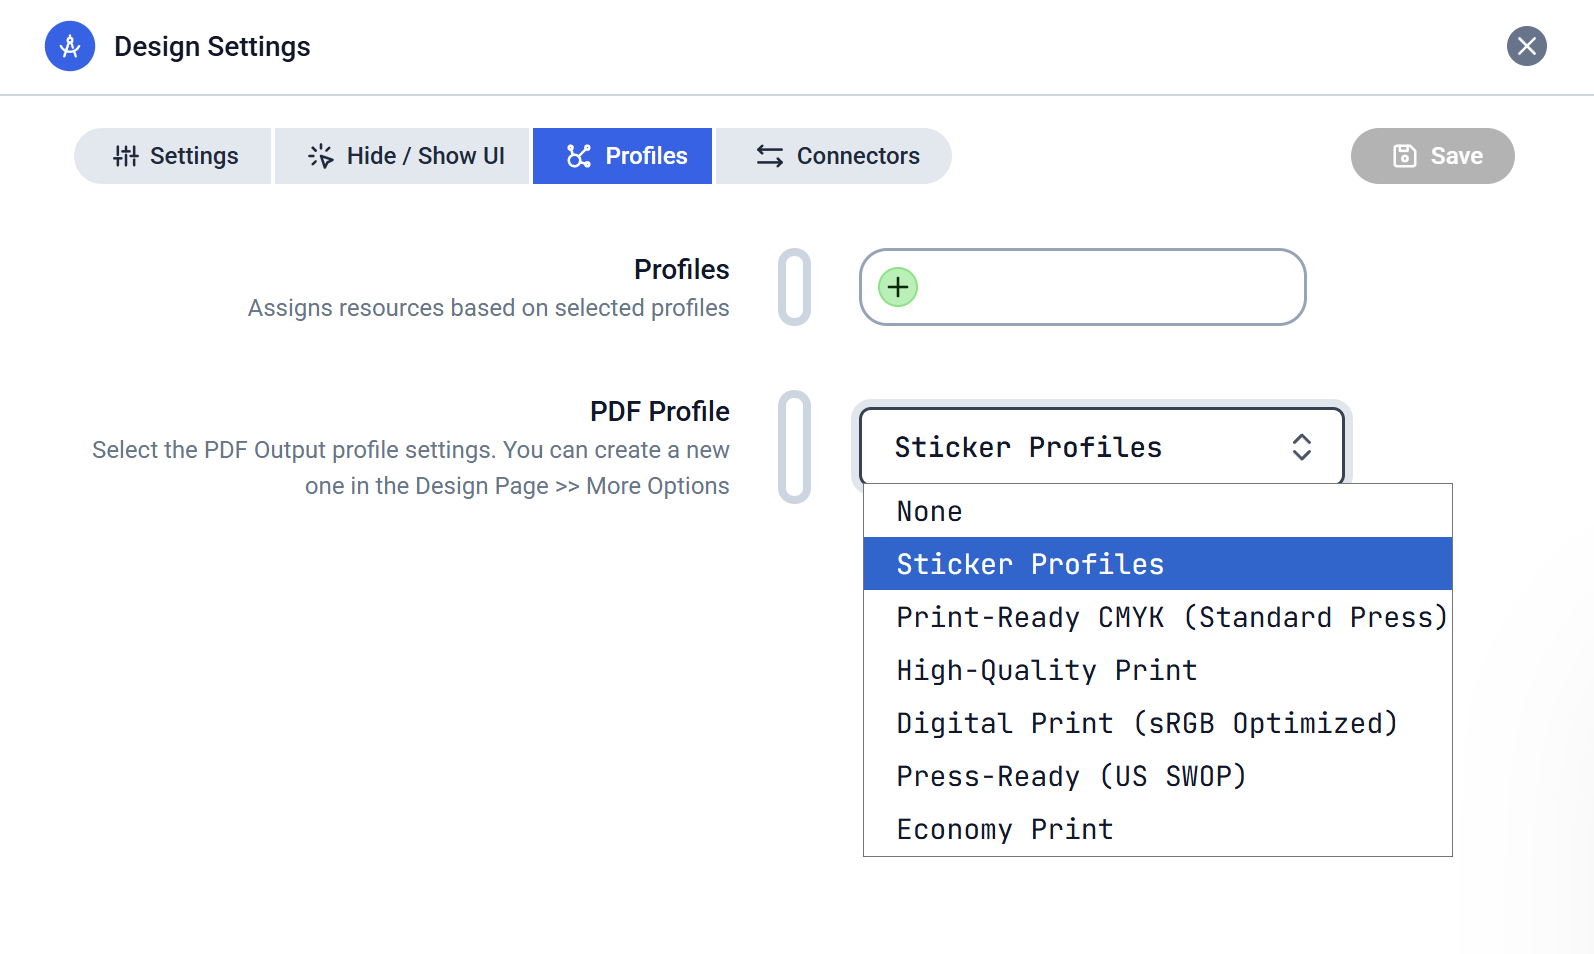
The Settings Panel will open on the sidebar and on the top bar, click the Profiles tab.
Click the PDF Profile dropdown and select the desired profile you want to assign to this template.
Finally, click the Save button at the top of the sidebar to save your changes.
You can assign a single PDF Output Profile to different Design Templates based on the print process or product requirements.
This allows you to have fine-grained control over the PDF rendering settings for your designs while being able to control the output from one place.