Skip to main contentIn the PrintApp editor, you can convert an Image or a Shape object into a repeating Pattern on the horizontal and vertical plane. You can also control the gap between the repeating objects as well as rotate and zoom them in place.
How to create a Pattern
-
To get started, load a Design or open one for edit from your Admin Designs page
-
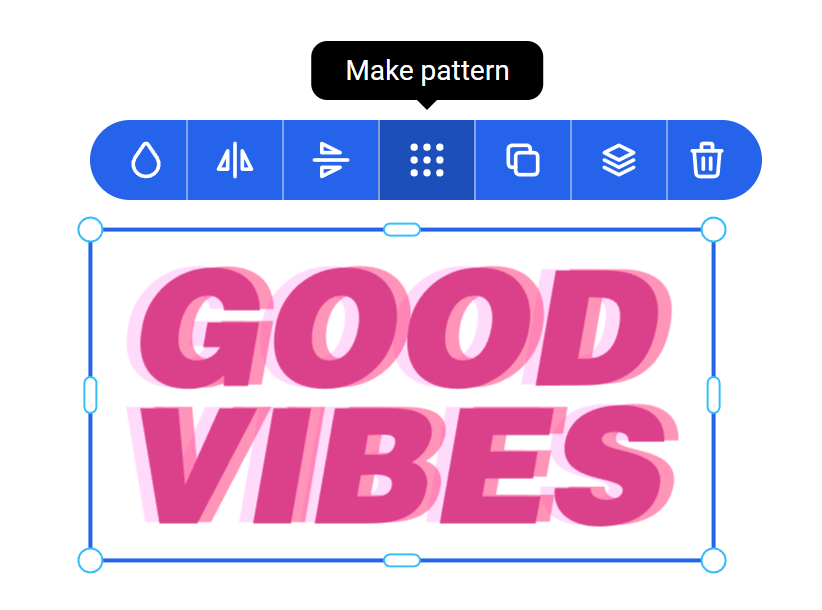
With your design opened, add any object from the Graphics panel unto the canvas and select it. You should find the Make Pattern button in the context menu as shown below:
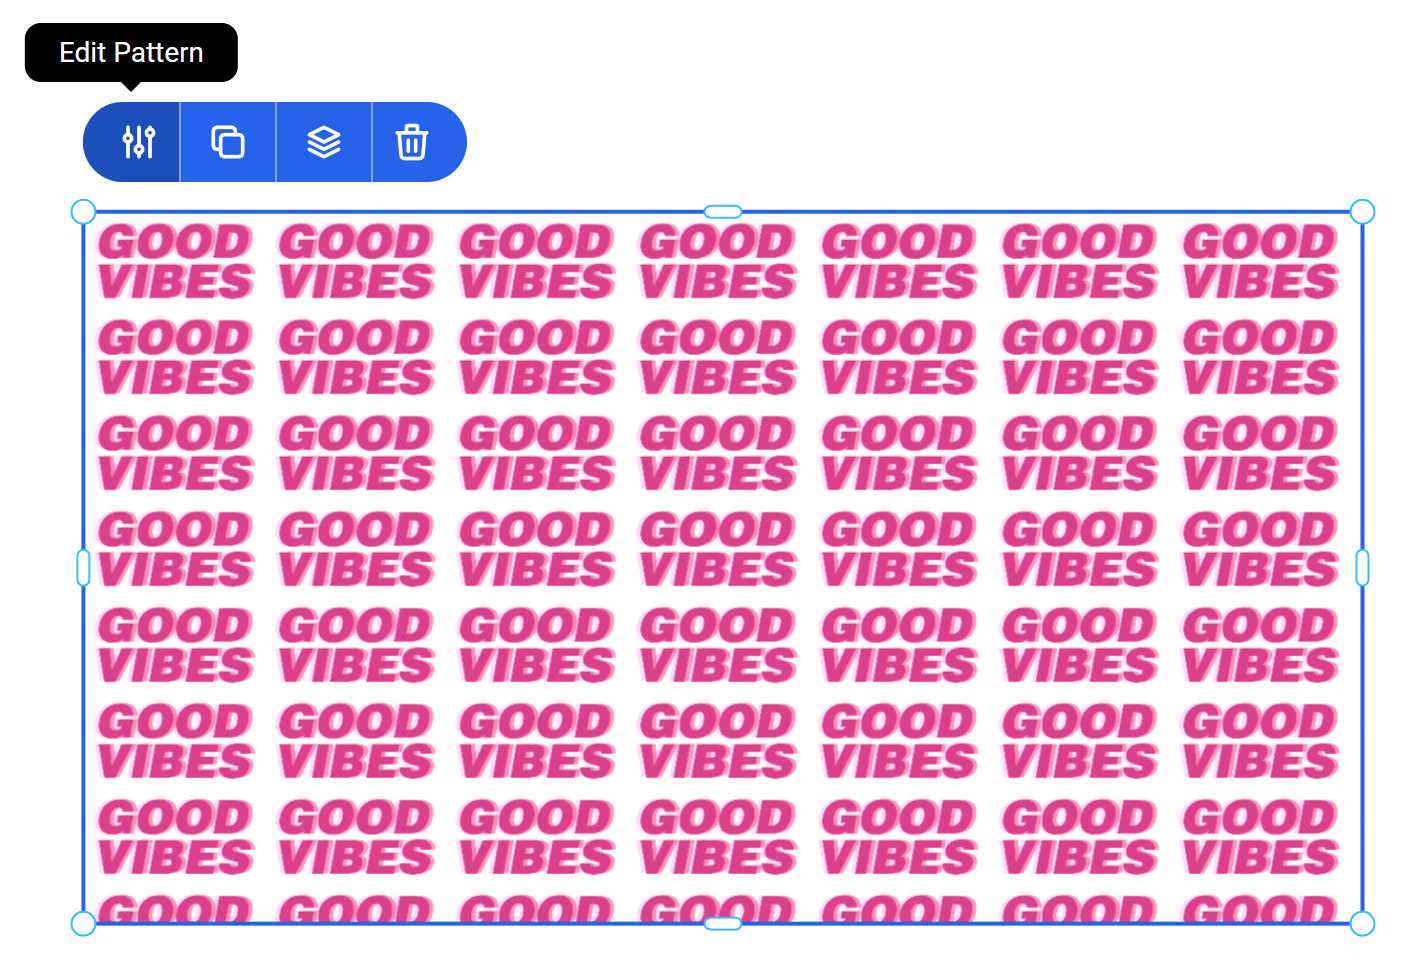
 Click the Make Pattern button to create a new Pattern Object from the selected graphic.
-
A new Pattern object will be created using the selected element. You can edit the Pattern by clicking the Edit Pattern button as shown below:
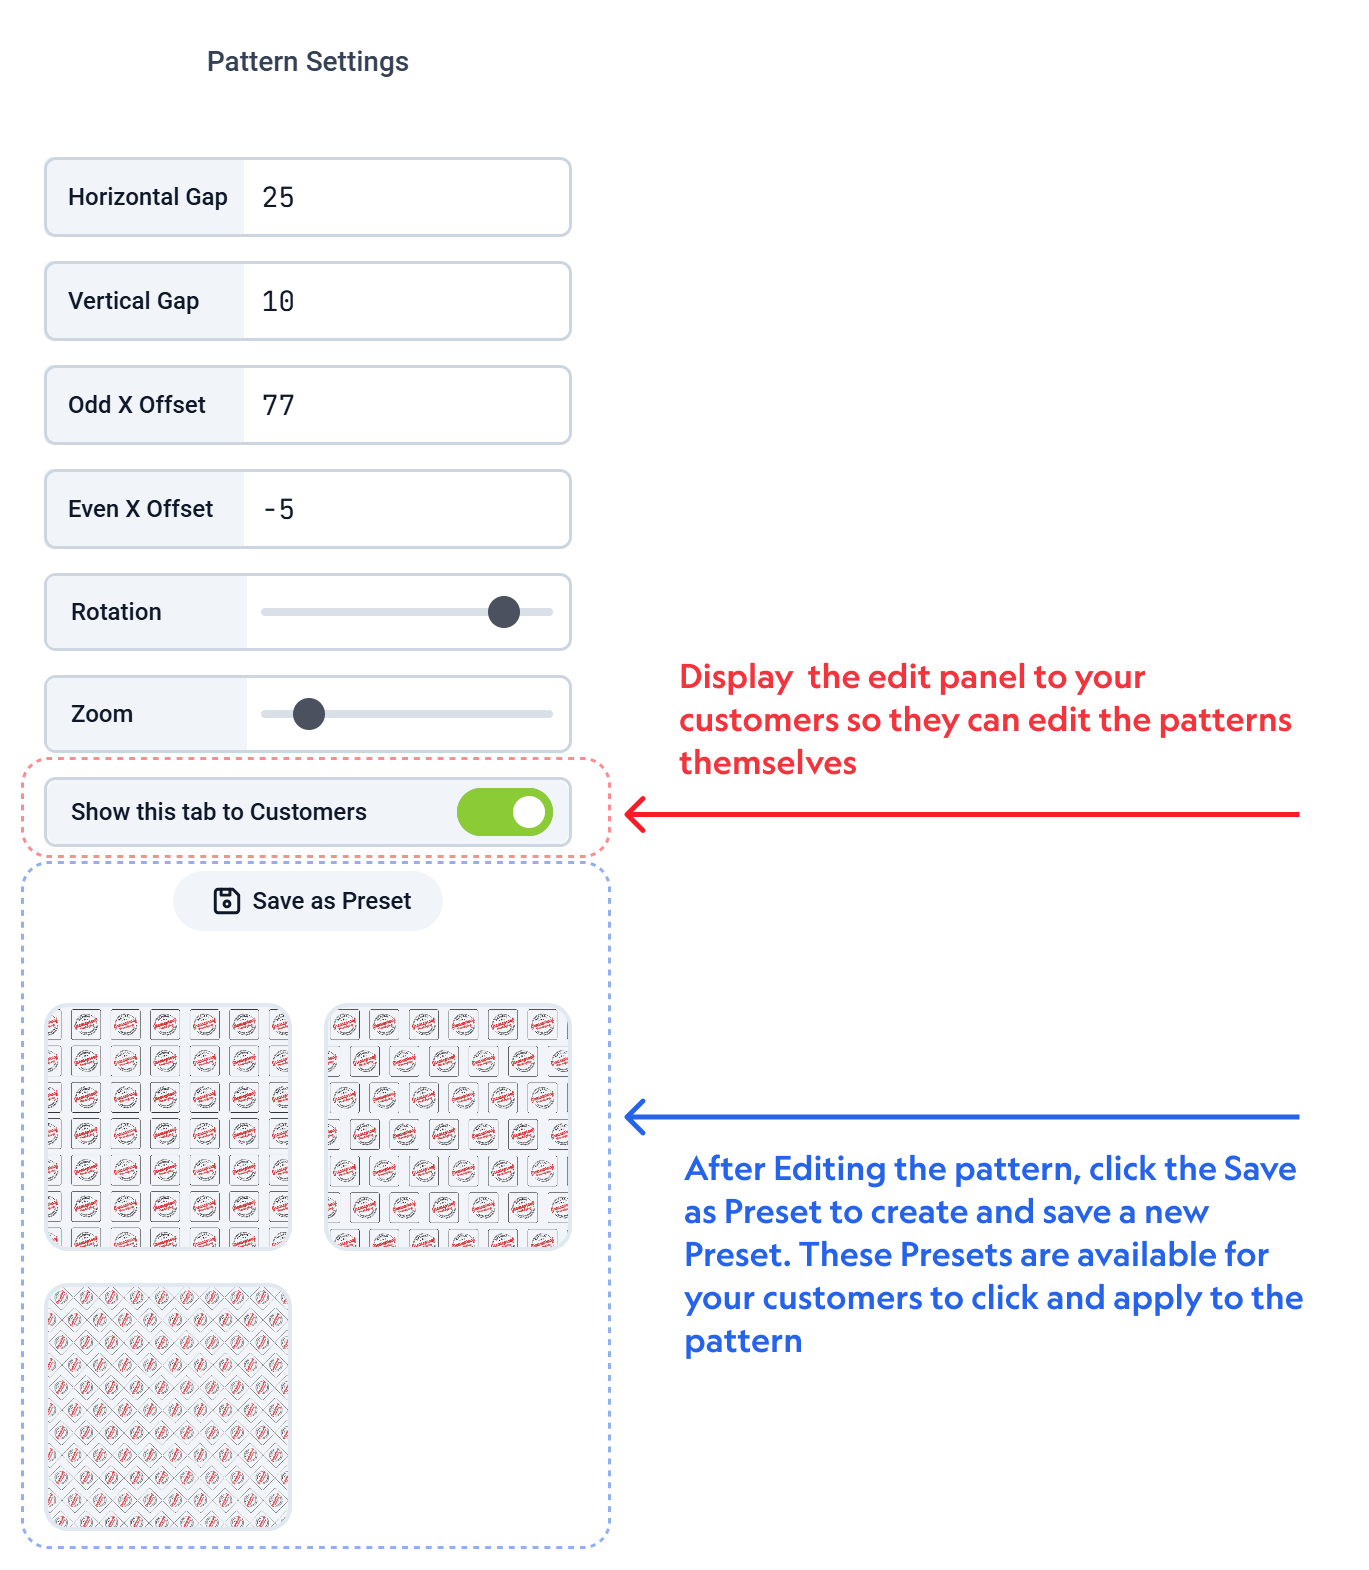
 You can edit the Horizontal or Vertical spacing, Zoom, Rotation and Odd / Even Offset values.
-
Enabling the button Show this tabe to your Customers will ensure this Pattern edit panel is also visible to your Customers when they personalize the design.
-
After modifying the Pattern, you can create a Preset from the patten by clicking the Save as Preset button.
This will save the current Pattern settings and display it as a short cut for your customers to apply them when personalizing the design.
-
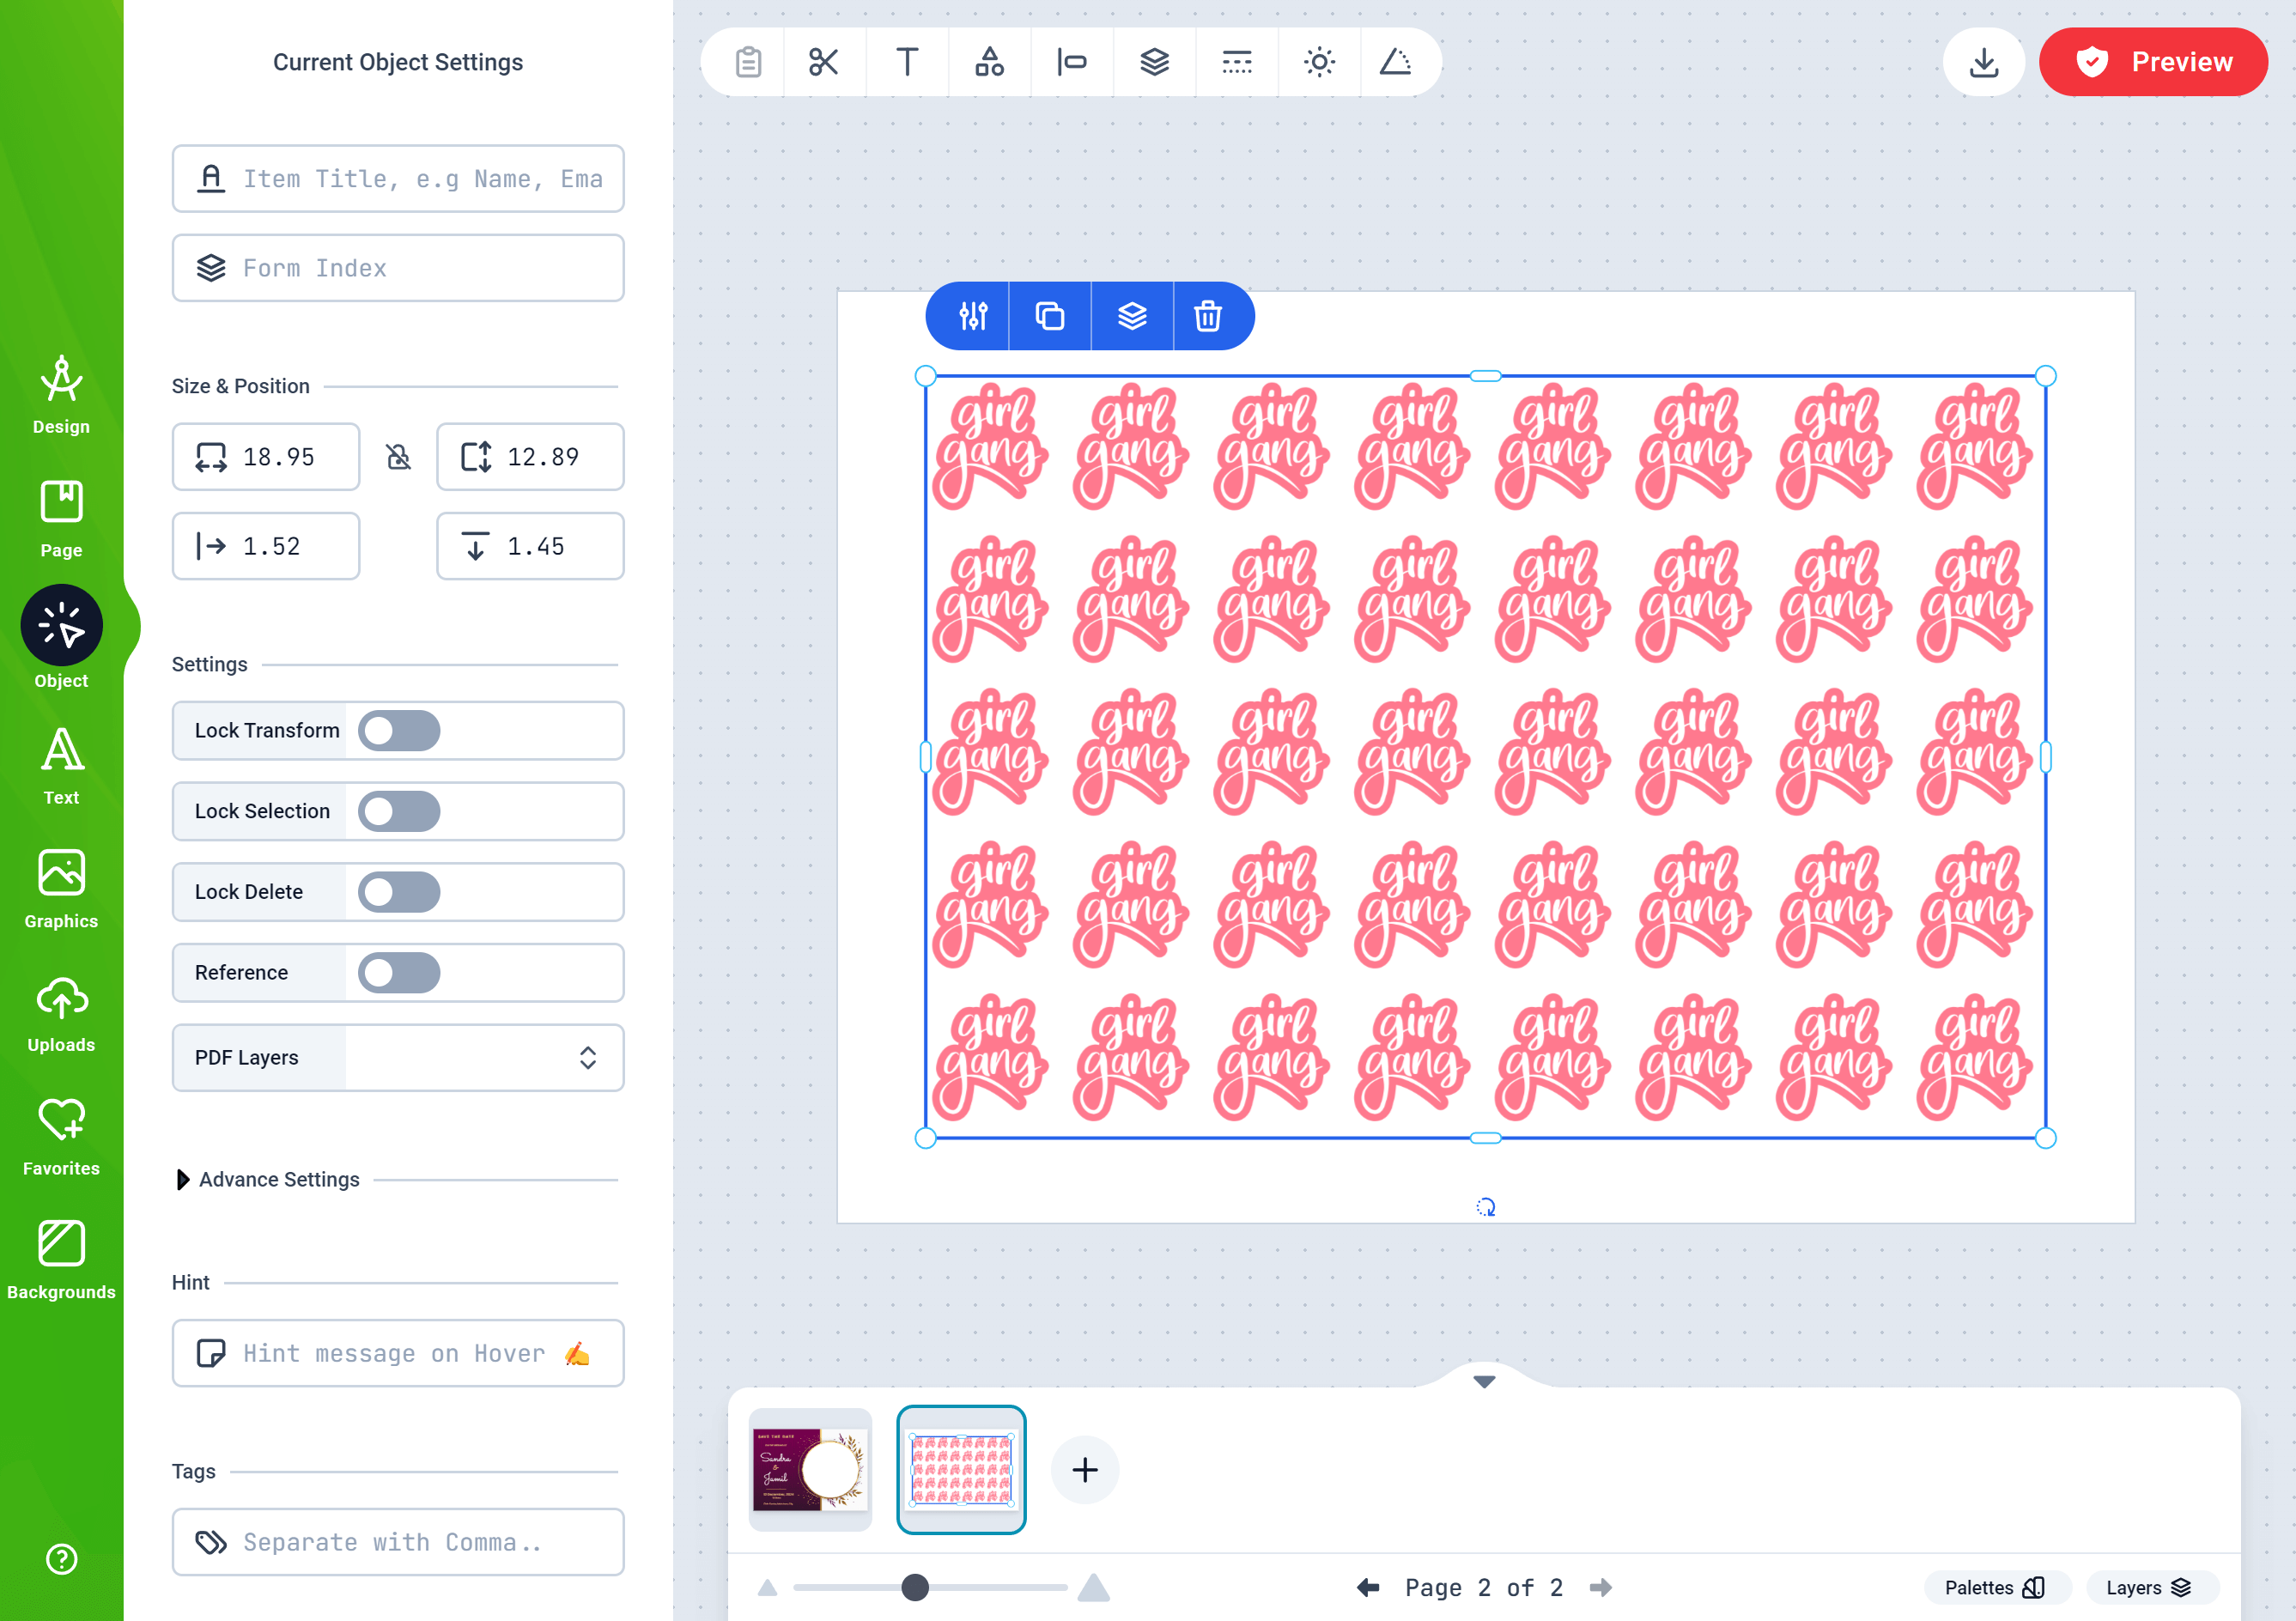
The Pattern is treated as any other PrintApp Object, configurable using the Objects panel. You can lock, scale and transform it as you deem fit.
-
The PDF engine uses the source element to render each individual Pattern item so they appear exactly as the source element.


