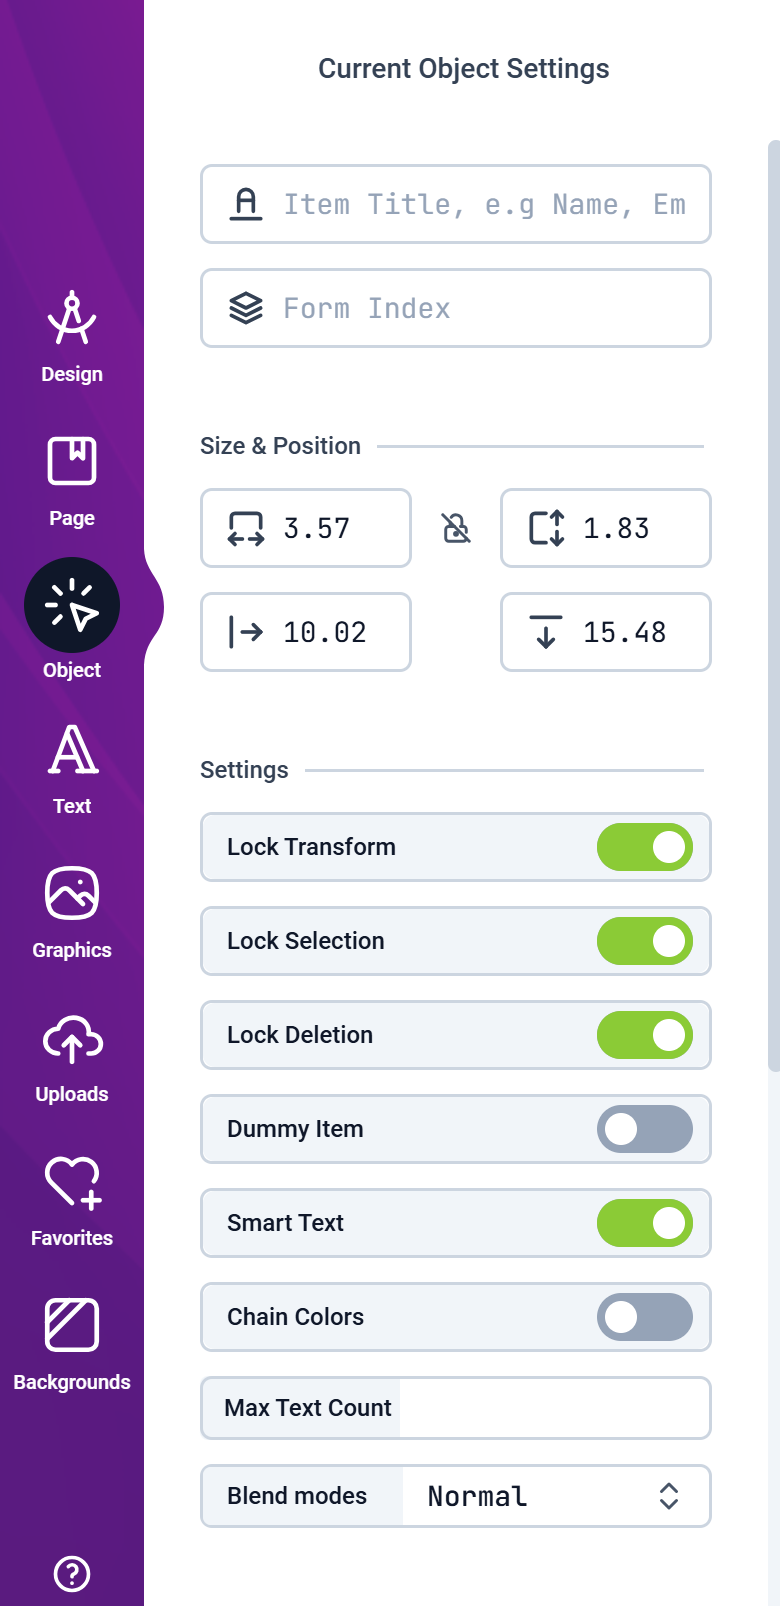
Object Title
Object title text, displayed in data forms.Form Index
This is a number used to specify the hierarchy of Objects if you have Smart Objects in a form. The higher the number, the higher it is in the form.Size & Position
Adjusts the Object’s size and position on the canvas.Set as Clipping Mask
This option is only available for plain Shapes that can be used to clip images. Enabling this option makes it possible for your customers to insert their photos into the shape and have the photo clipped inside the shape. Read more about Clipping Masks hereFit Photo inside Frame
This option is only available for Clipping Masks only. When enabled, the Image will be resized to fit inside the Clipping Mask.Lock Transform
Enabling this option prevents customers from moving or resizing the said ObjectLock Selection
When enabled, customers will not be able to select that Object.Lock Delete
When enabled, customers will not be able to delete that Object.Smart Text
This option is only shown for Text Objects. Smart Texts can have variables in them using curly braces, eg.{Email} that tells the Editor to treat it as form value.
Read more about Smart Objects here
Reference
This is used to set an Object as a placeholder or dummy item, so that it doesn’t appear in the final PDF or the preview.Hint
Here, you can provide a text message that is attached as a Note to the Object so that when your customer hovers over that Object, the Note / Tip is shown to customers.Blend Modes
Blend Modes are used to blend the Object with the background or other Objects. You can choose from a variety of Blend Modes like Multiply, Screen, Overlay etc.Max Text Count
This is used to limit the number of characters that can be entered in a Text Object.Chain Colors
When this option is enabled, the Object will change its color when the color of another Object is changed, if both objects have the same colors.Advanced Settings
Under the Advanced tab, you can find additional settings for the Object as shown in the image below: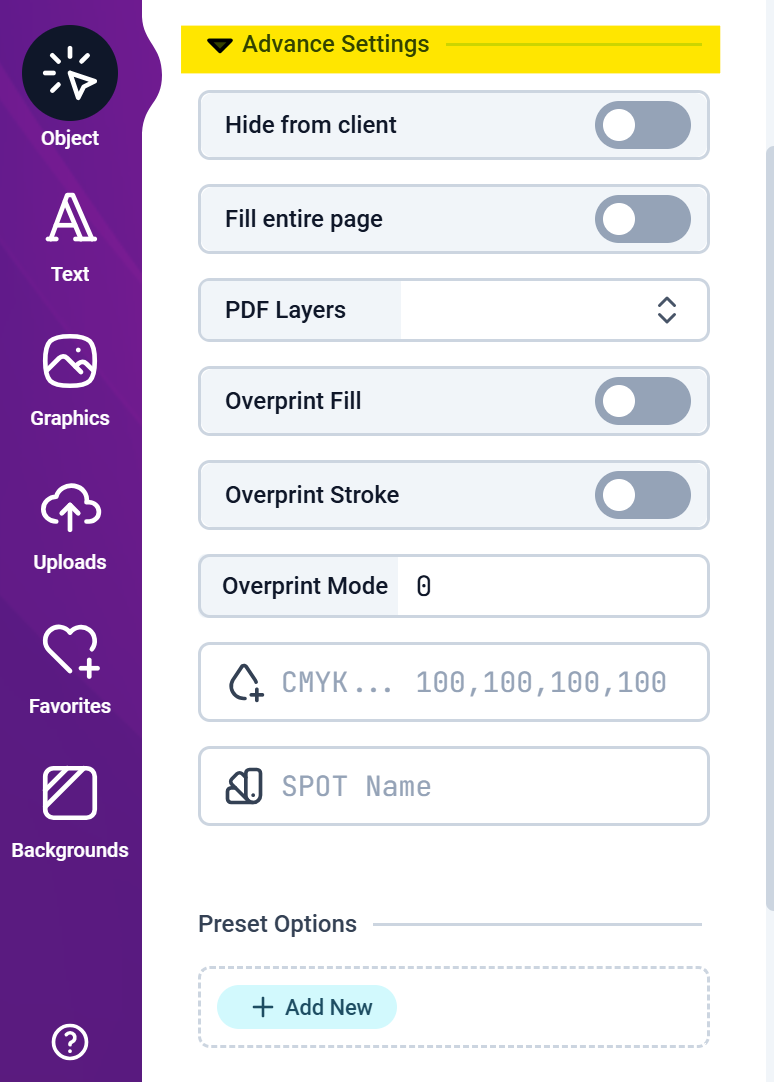
Hide from client
When enabled, the Object will not be visible to the customer in the Editor, but it will be printed in the output PDF.Fill entire Page
When enabled, the Object will be stretched to fill the entire page.PDF Layers
This option is allows you to set the Object to be printed on a separate layer in the PDF output. But first, you will need to create the PDF Layers by going to the Designs Tab and creating a Layer.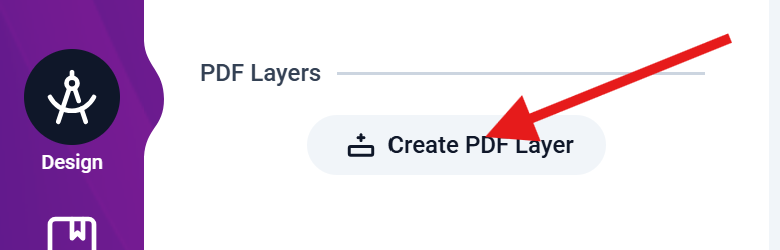
Overprint Fill
This option sets the Fill-overprint value for the Object in the PDF output.Overprint in PDF objects allows overlapping colors to blend when printed, instead of knocking out the background, ensuring specific visual effects or accurate spot color reproduction.
Overprint Stroke
This option sets the Stroke-overprint value for the Object in the PDF output.Overprint Mode
This option sets the Overprint Mode for the Object in the PDF output. The Mode can be either 0 or 1.Mode 0 (Default): Overprinting is disabled. The overlapping object knocks out (removes) the underlying content, fully replacing it with the top object’s color.
Mode 1: Overprinting is enabled. The overlapping object blends with or is added to the underlying content, preserving the background’s visibility where applicable.
CMYK Value
This option allows you to set the CMYK color value for the Object. This is useful when you want to set a specific color for the Object in the PDF output. This value overrides the color set in the Editor. Be careful when using this option as it will override the color set in the Editor and the Object will look different in the Editor and the PDF output.Spot Name
This option allows you to set the Spot Color name for the Object. This is useful when you want to set a specific color name for the Object in the PDF output. This value overrides the color set in the Editor.Preset Options
This is where you assign preset values to the selected Object. Presets allows you to currate and limit certain resources like Color, Graphics that will be permitted for the specific Object. You can also use the Presets to limit the controls that can be used to modify the Object.Read more about Presets here